Frameclear
From a first comparison to a saved video
A practical workflow for inspecting what changed. Keep the source file as your backup.
Choose a correction mode
- Fast correction
For dark footage, raise the exposure gradually. - AI denoising β (compare when paused)
Try this on grainy footage. - AI detail beta (compares when paused)
Try this if edges look soft when enlarged. Reconstructed details in faces or text may differ from the original scene.
Free · No sign-up
Reduce noise in moving footage
The same scene from real footage with artificial noise added. Switch views to compare the background grain and the feather and mesh detail.
Use the buttons to compare before and after at the same position. You can also choose an area to view.
Enlarged view
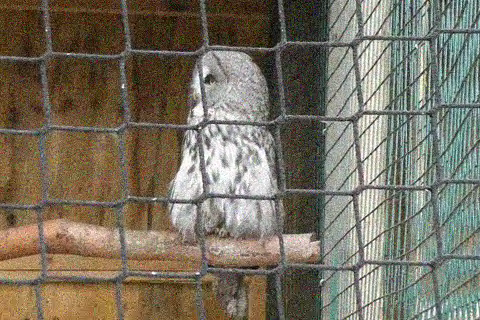
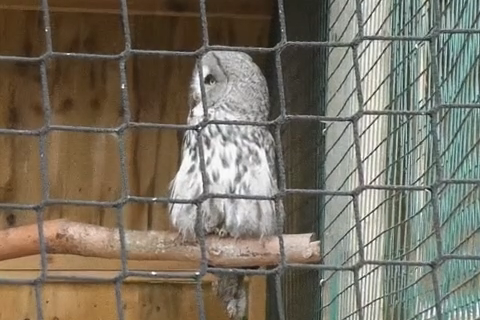
Real footage with artificial noise added, before and after AI denoising.
Results vary with the footage. Check for blurred detail or smearing in moving areas.
Great grey owl (Strix nebulosa) — The Nature Box · Source · CC BY-SA 3.0
Correction settings
AI denoising: Stronger. Correction strength 100%. 640×360, 24fps, MP4 (H.264), without audio.
See the brightness example too
Make a dark video easier to see
The same moment from the same clip. Compare the green leaves and the colour of the pot before and after the brightness adjustment.
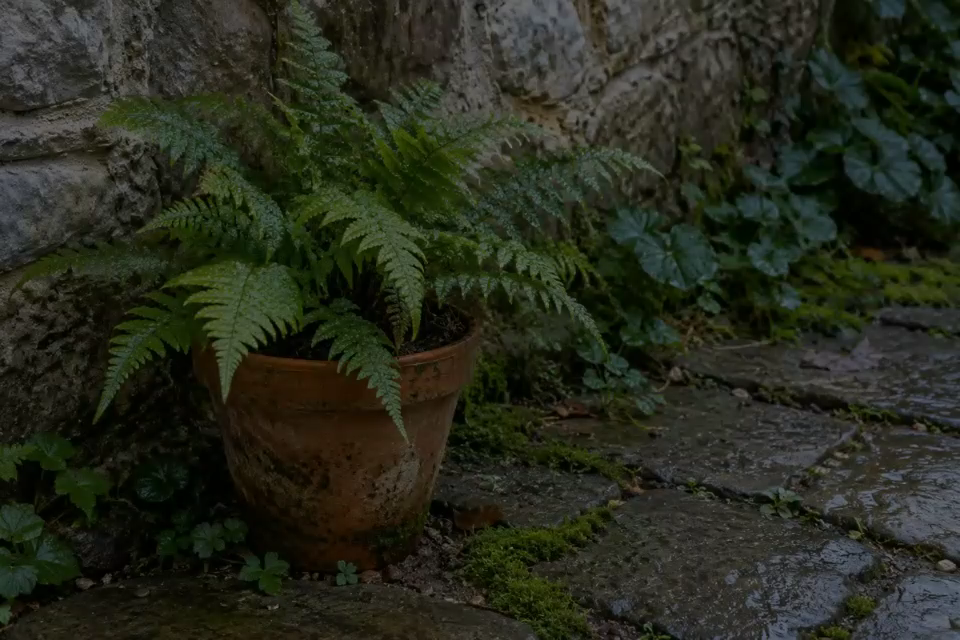
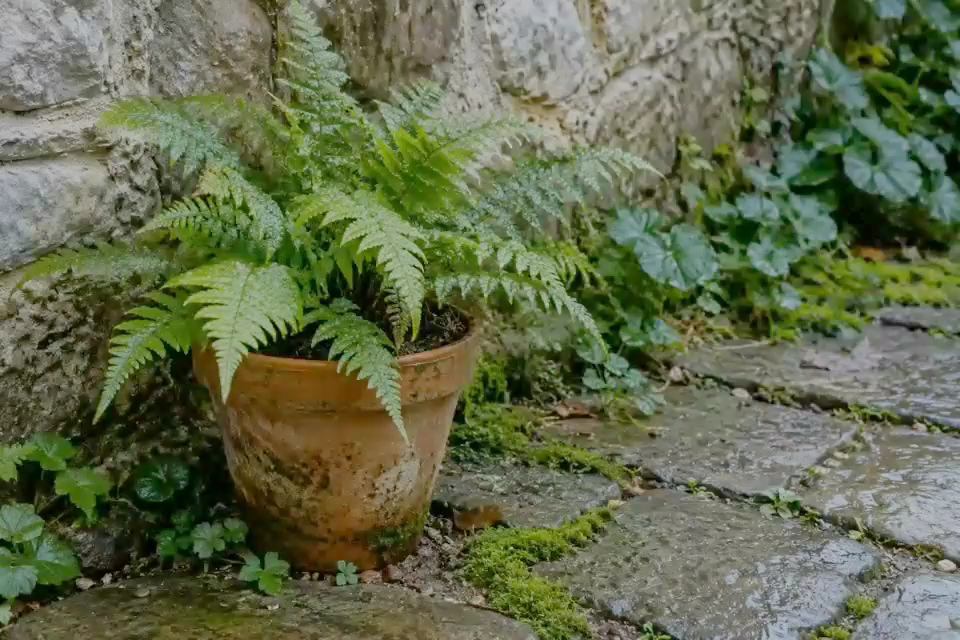
Brightness correction on a video made from a generated image. AI correction was not used.
Raise brightness gradually and check that bright areas retain their detail.
Correction settings
Fast correction, exposure +2.00, strength 100%. Noise reduction, sharpness and static flicker reduction are all 0. Saved at 960×640, 24fps, MP4 (H.264), without audio.
Compare, adjust and save your video
Start with the problem you can see
- Too dark
- Raise brightness gradually and compare with the original. Check that bright areas do not turn into featureless white.
- Too much noise
- Start with denoising. If faces or text become smeared, reduce correction strength and compare again.
- Unnatural outlines
- Lower sharpness and compare with the original to see whether the outlines look less exaggerated.
Three steps with a short video
- Open a short video on your device, or try the sample video.
- Gradually adjust brightness, noise reduction and correction strength. Move the comparison divider to compare the result with the original.
- Choose the range to save and select “Save video (supports AI)”. Download the finished video, then play it to check the picture and sound.
If AI processing stalls, try “Fast correction”. You can also save with “Record during playback (fast correction)”, which takes the video’s playback time. If saving fails, try a shorter range, switch between MP4 and WebM, or use another browser.
Open a video file
Try MP4 or WebM. Playback and export depend on your device’s codec support. Load sample video loads a provided clip made from real footage with artificial noise added. You do not need to upload your own video.
Inspect the correction
Start with Standard and move the divider. Look at noise, edges, faces and text. Reduce strength if details look wrong. At 0% strength, restoration and AI are bypassed.
Export a short range
Choose start and end points and keep the original dimensions first. To apply AI to every frame, choose “Save video (supports AI)”. “Record during playback (fast correction)” runs in real time and requires fast correction; if AI is selected, switch correction methods before exporting. After export, use Download video unless you chose direct saving.
Check the saved result
- Play the saved clip in another player and check that its start and end match the selected range.
- If moving edges or small text smear or change shape, reduce correction strength and export again.
- If the source has sound, check that the saved clip includes it and stays in sync.
- Check orientation and dimensions. Save under a different name or in a different location from the source. Choosing an existing file for direct saving may replace that file.